Insights > Article > Posted: 2023-Nov-16, Updated: 2025-Dec-24
Window Waterproofing in Ottawa: Why Flashing Comes First

In this article:
Introduction
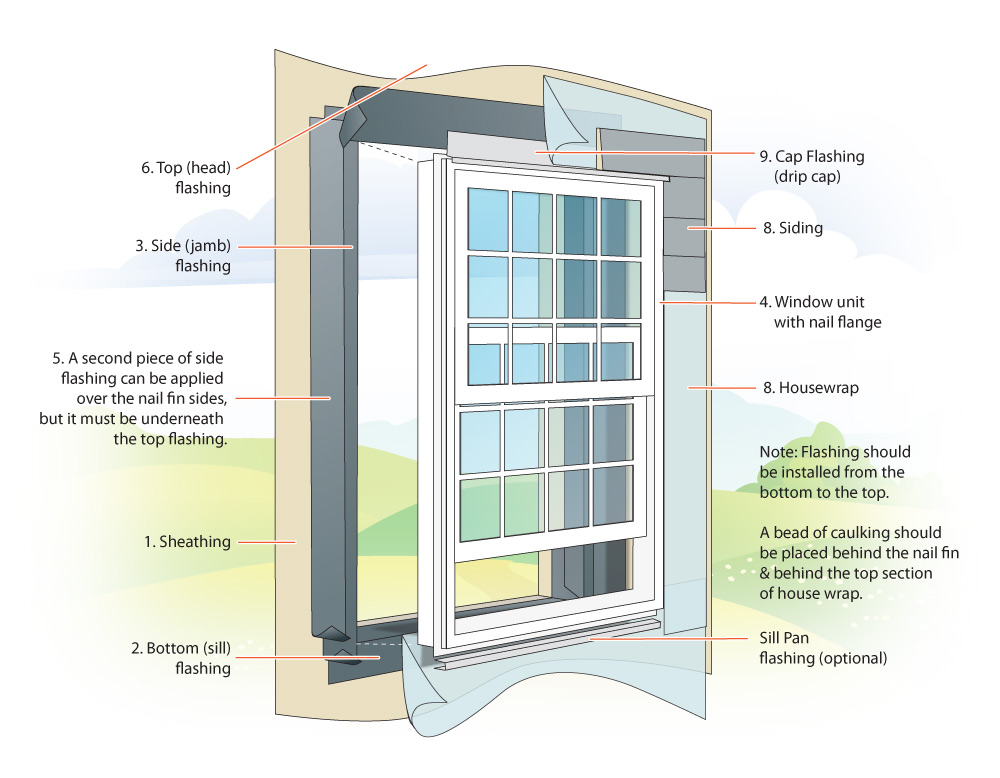
Window flashing refers to a thin, often flexible material that is installed around a window frame to prevent water, moisture or wind infiltration between the window where it meets the exterior wall of a house. Flashing helps direct water down and away from the exterior of the home and prevents it from seeping in around the window, where it can result in mould growth, wood rot, and structural damage.
If a homeowner or window or door installer discovers water damage, it is often the result of faulty flashing - if it is, it may have been installed incorrectly. To repair faulty flashing, sections of the exterior siding, except brick, may need to be temporarily removed, and the faulty flashing repaired.
Flashing comes in a variety of materials, including aluminium, flashing tape, vinyl and rubber. Some materials are best suited for vinyl or wood siding, and others may be more suitable for brick and stone. No matter which material is being used, if it is not properly installed, water may leak into the wall at the top, through the sides or at the bottom of a window or door, often causing visible or hidden damage.
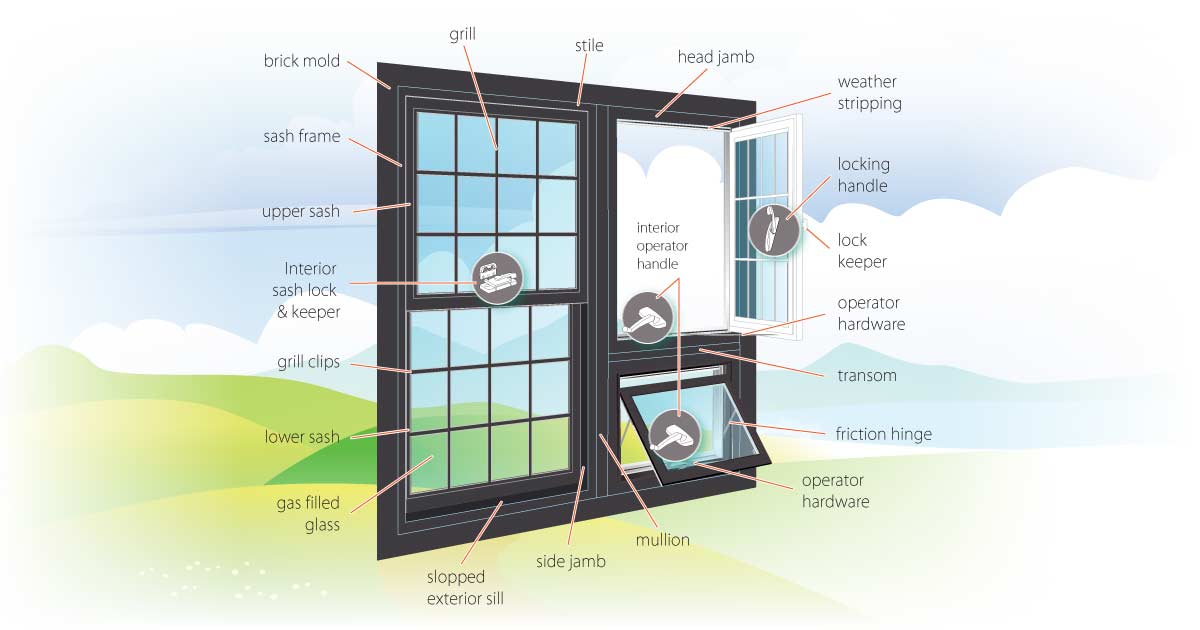
Most of the window flashing will be hidden by exterior window framing, capping or other window applications.
When replacing a window or door, it is possible that the original integrity of the flashing can be upset, a professional window or door installer, following the manufacturer's instructions, will know how to inspect, reset, repair or modify the window flashing to its original integrity.
Because flashing is an important and sometimes complicated part of the window installation process, it should be left to a professional.
Window flashing is important
During the construction of a new home, a builder will take many precautions to ensure the home is protected from water damage. Unfortunately, this is not always the case, and for much older homes, the building practices used in the past may not measure up to today’s standards.
It is not uncommon to find homes that have no window flashing at all, plus as many older homes settle, little tears or tiny gaps may occur in the flashing. Water will find its way through the smallest of holes.
How flashing works
Flashing for both windows and doors is designed to act very similarly to shingles on a roof by diverting water over successive overlapping layers of flashing material. Fashing is typically fit around a window or door frame in 2 parts:
- Flashing tape is applied in a specific order around the sides of the window on the exterior wall of the house.
- A drip cap (fit over the top of a window) and a sill pan (that will butt up against the bottom of the window or extend out). Note: these may not be required for brick homes.
The correct installation of flashing
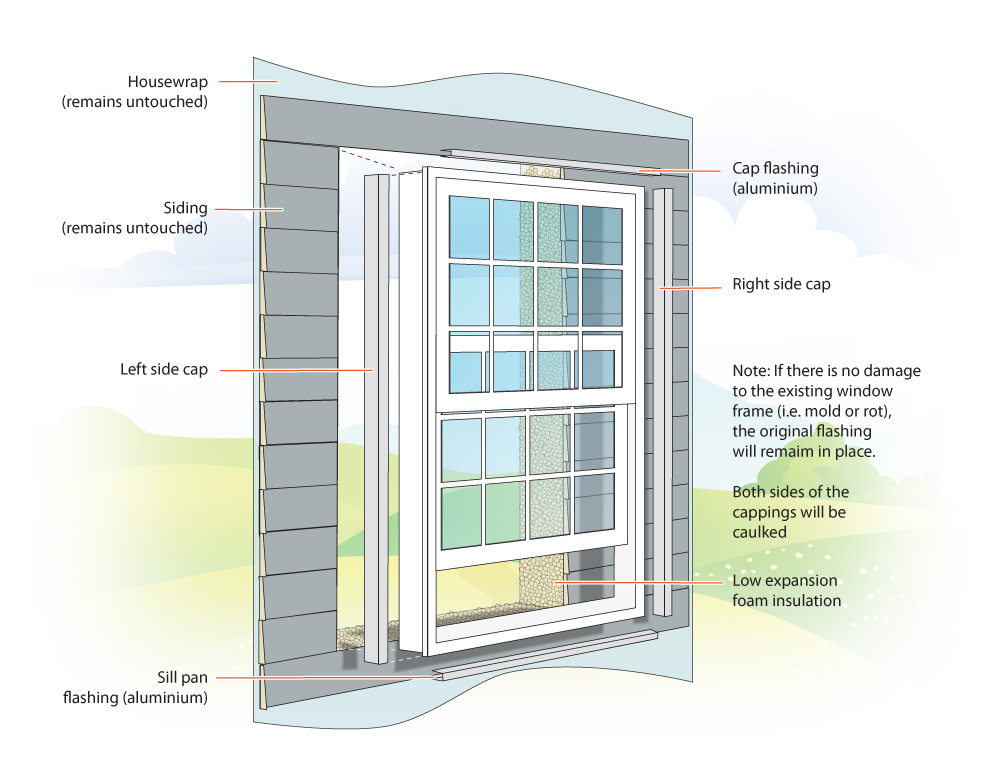
When a window is being replaced, an installer will typically use the pre-existing flashing. Depending on the requirement of the client, flashing may be treated differently from one window or door replacement to another. In some cases, capping and caulking will serve as a second line of defence for protecting areas around windows and doors.
It is very rare for a window manufactured to today’s standards, coupled with a professionally installed to leak. If water does leak into a home from a window, it will often be an underlying issue that started with the building of the home. A professional installer will be able to diagnose problems - it could be a faulty installation, an incorrect flashing application, or a structural change in the home. Either way, a qualified window installer should inspect the window, and it should be repaired promptly to prevent water damage.
What about replacement windows?
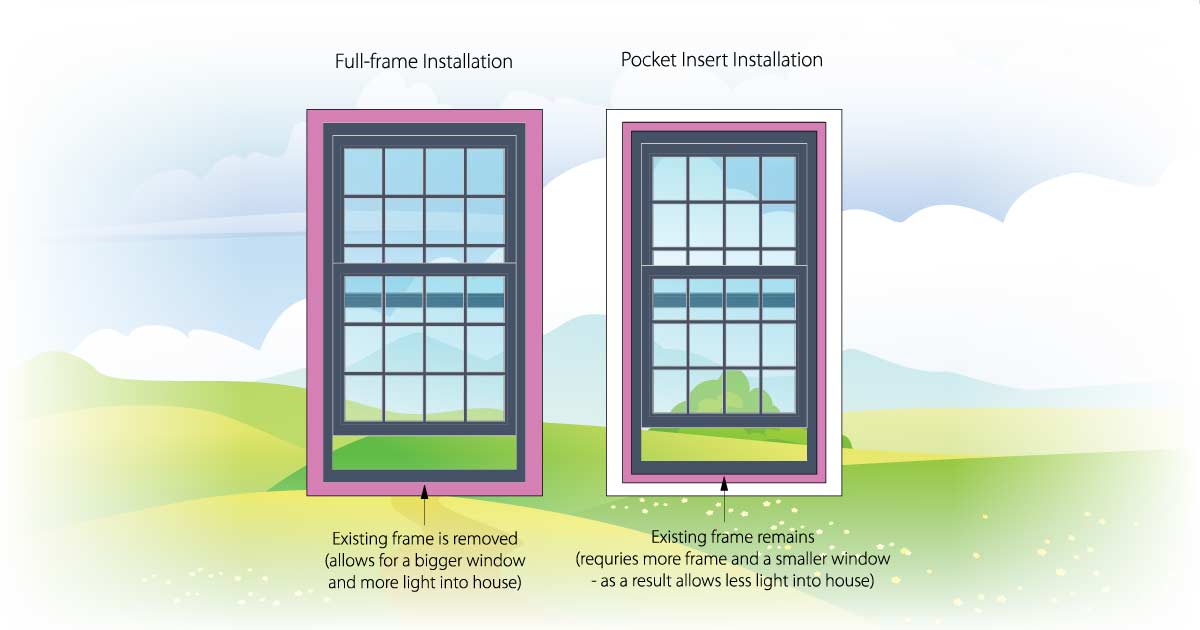
If money were no concern, many window replacement companies would insist on removing some of the house siding material and removing the existing flashing material and rebuilding it from scratch - a pretty labour-intensive proposition that would probably double the installation cost.
Of course, not all windows are installed the same way - window manufacturers understand this. So when it comes to proper replacement installation, each manufacturer will specify a correct procedure to handle flashing in order to ensure their products are being installed correctly.
The process for removing and replacing windows is very similar from one house to another, but there are exceptions. If pre-existing issues are found within the walls of the home as a window is being replaced, the process must accommodate the repair of all uncovered problems.
Basic Process:
- The old window will be removed
- If the existing flashing is intact, it will be left as is
- The window will then be inserted, shimmed level/plum
- An insulation foam will be injected around the entire window
- A sloped top cap, capped sides and a sloped bottom cap will be made to fit.
- The cap edge that meets the siding/brick will be caulked
- The inside cap edge, where it meets the window, will be caulked
To ensure your windows are being installed correctly, look for a company that offers and is committed to a lifetime warranty on the installations they are performing.
Related articles


Need more information?
If you would like to know more about what we do to ensure the windows we install are properly waterproofed, give us a call or send us a request for more information. We’d be happy to answer all of your questions.

